In this post we will review the tool we created at Technofocus for uploading a fixed sized VHD to my Windows Azure storage account.
As you execute the tool here is the default view of what appears instantly:
Step 1: Click Connect
The following Azure window opens up that allows you to sign in to your Azure account:
Step 2: Pull down the subscription drop down menu to choose from the subscriptions if multiple subscriptions are associated with this account:
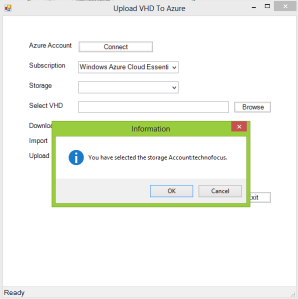
 Step 3: Next, as you select an Azure subscription, it populates the Storage drop down menu with the storage accounts already created and associated with that Azure account for you to choose alongwith a confirmation:
Step 5: Next, Browse for the VHD that you wish to upload. Make sure the VHD is sysprepped and fixed size as per Azure requirements.
 Step 6: Next, Download the Azure Settings File by clicking on the button. This will allow you to save the file from the Azure website:
Step 7: Import the settings in form of the saved file in Step 6 above:
Note: Steps 6 and 7 may just be executed once on a given computer. Once imported the step may not be repeated for another upload.
Step 8: Next , just click the “Upload VHD Now’ button to start the upload to the ‘vhds’ container of the selected storage account. The vhd file will be copied with the same filename as the source file.
Check the status bar for progress.
Operation completed successfully after upload.
Verifying the same as we logon to Azure portal: Notice the AzSample3m.vhd that just got uploaded.
Enjoy!
Contact Me for more information:


fake pussy